tester

Use of cookies

We use cookies to improve and analyse your browsing experience on our web. You can accept these cookies, reject them or choose your settings by clicking on the corresponding buttons. Please note that rejecting cookies may affect your browsing experience. For more information you can consult our Cookies policy.

Configure cookies

Cookies are an essential part of how our web works. The main goal of cookies is to make your browsing experience more comfortable and efficient and to improve our services and the web itself.
Here you can find all the information about the cookies we use and you can activate and/or deactivate them according to your preferences, except for those cookies that are strictly necessary for the operation of the web. Blocking some cookies may affect your experience on the web and how the site works. For more information you can visit our Cookie Policy.

Strictly necessary (technical) cookies

These Cookies are necessary for the web to function and cannot be disabled on our systems. They are generally only set up in response to actions you may take such as requesting services, setting your privacy preferences, logging in or completing forms. You can set your browser to block or warn you about these cookies, but some parts of the web will not work. Information about Cookies.

Analytical cookies

These Cookies allow us to count the number of visits and traffic sources so that we can measure and improve the performance of our site. They help us to find out which pages are the most popular and least popular, and to see how visitors move around the web. All information collected by these Cookies is aggregated and therefore anonymous. If you do not allow these Cookies we will not know when you visited our web. Information about Cookies.

Third party cookies

These cookies are used to analyse your activity in order to show you personalised advertisements. Information about Cookies.

Accept Decline Configure cookies Confirm selected
Search
×
Notes
Search
There are no notes
  • Cómo copiar clase precargada
  • To customise Pencil press Alt + Down Arrow
  • To customise Highlighter press Alt + Down Arrow

    Change theme

    Error - please check your internet connection...
    Back

    Blink Help

    x
    Error - please check your internet connection...

    How can we help you?

    No results

    View full manual

    Couldn't find what you were looking for?

    Please describe the issue you are experiencing and provide as many details as possible. Let us know the book, class, access device, licence code, username, used browser or if it occcurs in our app:

    Thickness:
    Font size:
    Filter
      No resources found
      Font size:
      Revision mode

      Revision mode

      Cómo copiar clase precargada
      Clases
      Without background sound


      ÍNDICE DEL MANUAL

      Accede a BlinkLearning

      Crear una clase copiando un grupo

      Cómo editar la clase


      Accede a BlinkLearning

      Para crear una clase con tus estudiantes mediante la opción Copiar clase, es necesario que el centro educativo haya solicitado a BlinkLearning pre-cargar todas las clases desde el administrador del centro. De esta forma, todas las clases quedarán cargadas por grupos y niveles.

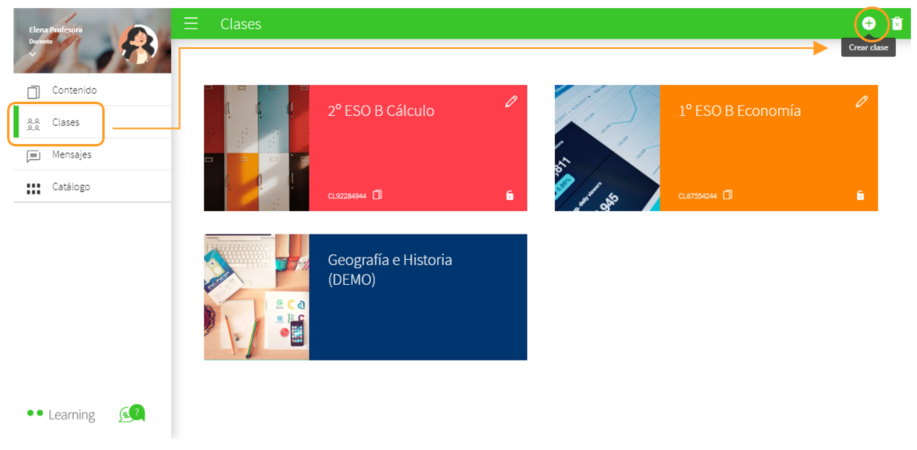
      Inicia sesión con tu usuario y contraseña en BlinkLearning y asegúrate de tener el libro que asignarás a tu clase en la pestaña Contenido – MIS CONTENIDOS. Después, sitúate en la sección Clases y haz clic en el botón + CREAR CLASE de la barra de navegación superior.

      Crear una clase copiando un grupo

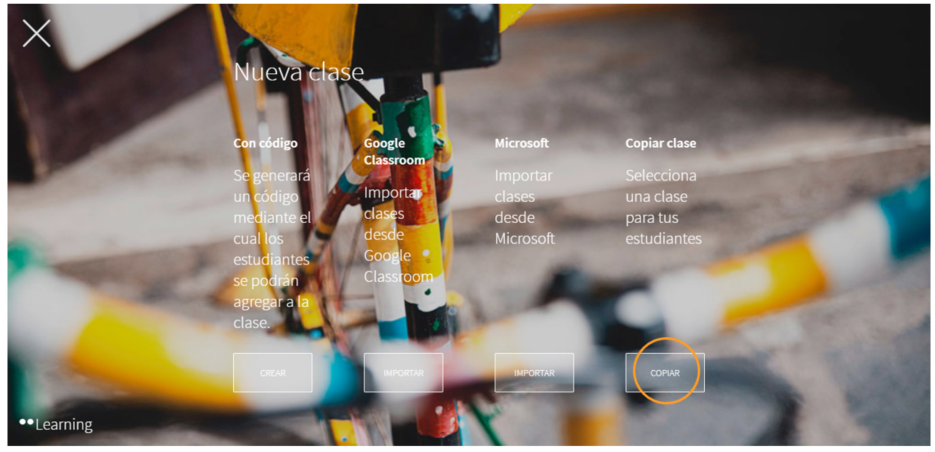
      Después selecciona la opción Copiar clase, haciendo clic en COPIAR .

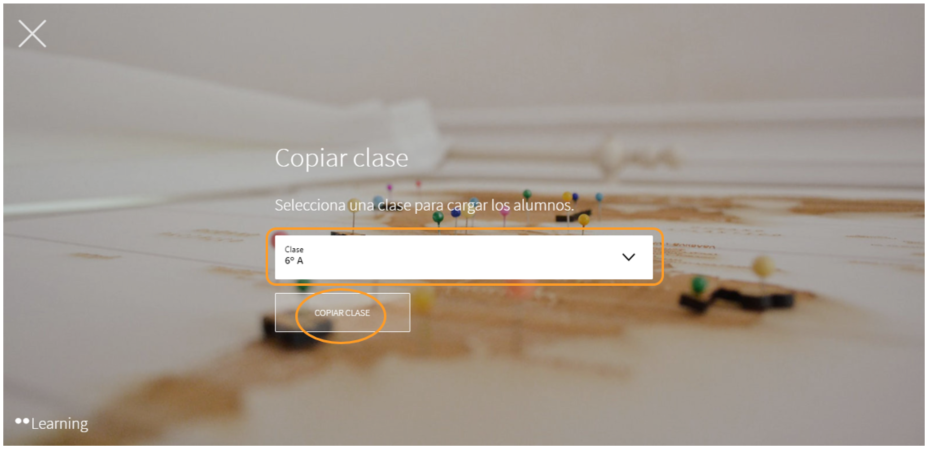
      En el desplegable, selecciona el grupo que quieres copiar y haz clic en COPIAR CLASE .

      A continuación, rellena los datos de la clase (nombre, nivel, grupo y asignatura) y revisa el listado de estudiantes que pertenecen a ese grupo.

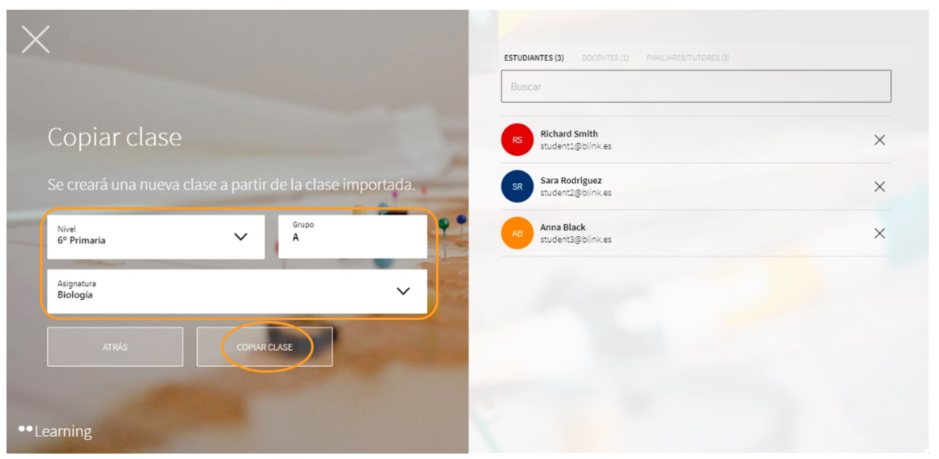
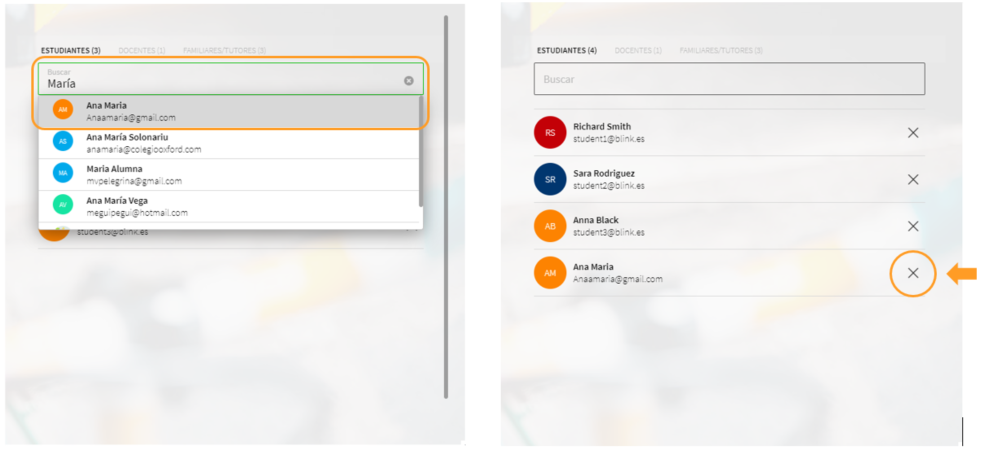
      En caso de ser una clase de grupos mixtos/optativa, podrás añadir o eliminar estudiantes desde el listado que aparece en la parte derecha.

      Para añadir, escribe el nombre o email en el buscador y selecciona el estudiante que deseas que se sume a la clase. Para eliminar solo tendrás que hacer clic sobre la X.

      Cómo editar la clase

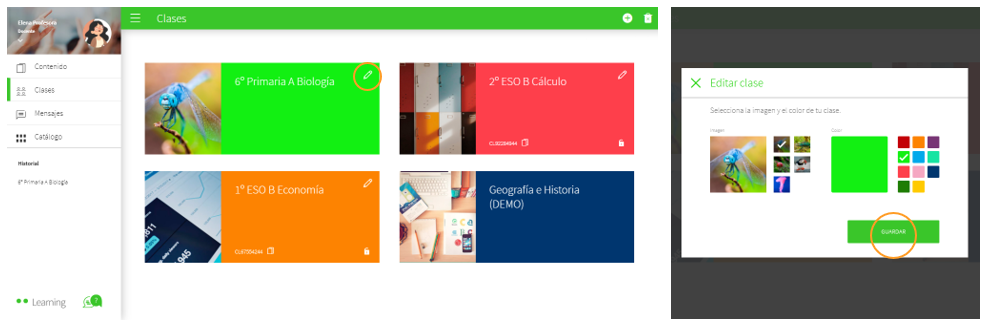
      Una vez creada la clase, la podrás editar y personalizar haciendo clic en el lápiz. No aparecerá el código ni el candado, ya que solo podrás editarla desde tu perfil como docente para añadir o eliminar estudiantes y será siempre de forma manual.

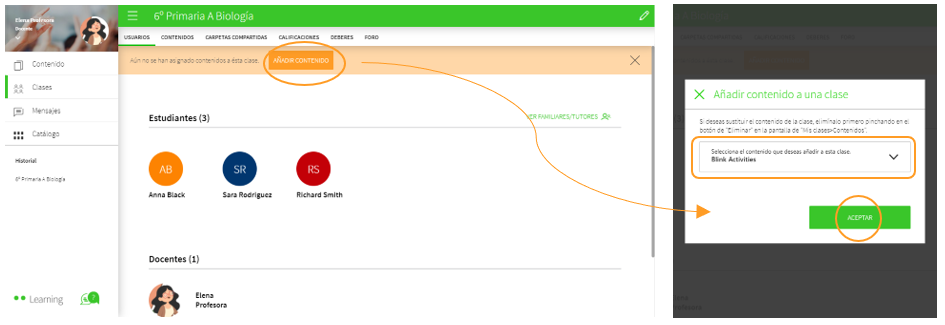
      A continuación, deberás añadir contenido a tu clase. Para ello, entra dentro y haz clic en AÑADIR CONTENIDO, selecciona el libro en el desplegable y haz clic en ACEPTAR  .

      En cualquier momento podrás editar la información de la clase haciendo clic en el lápiz.

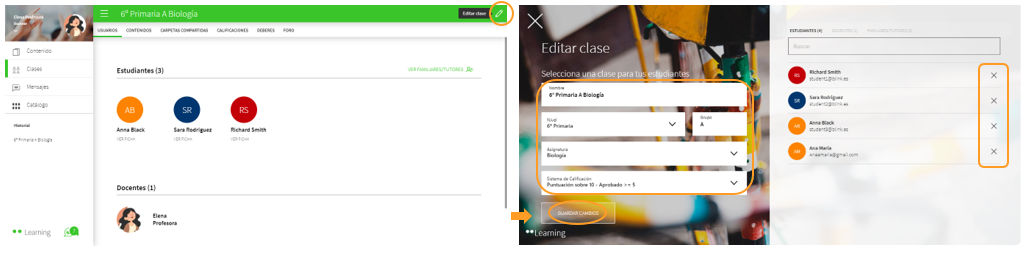
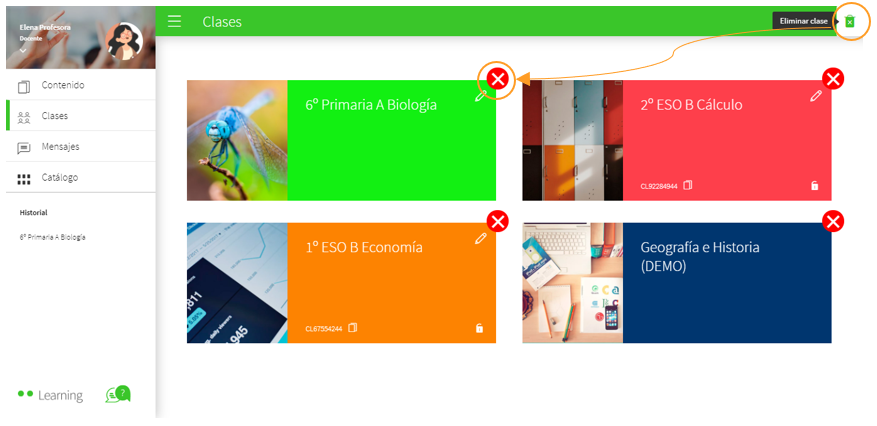
      También puedes eliminar la clase si la has creado por error. Activa el botón que indica Eliminar clase y haz clic sobre la X roja de la clase que deseas quitar.


      ¿Necesitas ayuda?

      Escríbenos a help@blinklearning.com con tu consulta.


      Consulta las dudas que tengas
      ←  desde tu perfil aquí


      Todos los videotutoriales de
      BlinkLearning aquí  →


      ,
      You have completed the lesson!

      Below is the time you have spent on the activity and the score you obtained.

      Time spent

      Score

      1. 1
        Eraser
        Rich text editor
        close