tester

Uso de cookies

Utilizamos Cookies para mejorar y analizar tu experiencia de navegación en nuestro sitio web. Puedes aceptarlas todas, rechazarlas o elegir tu configuración pulsando los botones correspondientes. Ten en cuenta que rechazar las cookies puede afectar a tu experiencia de navegación. Para más información puedes consultar nuestra Política de Cookies.

Configurar las cookies

Las cookies son una parte esencial de cómo funciona nuestra web. El objetivo principal de las cookies es que tu experiencia de navegación sea más cómoda y eficiente y poder mejorar nuestros servicios y la propia web.
Aquí podrás obtener toda la información sobre las cookies que utilizamos y podrás activar y/o desactivar las mismas de acuerdo con tus preferencias, salvo aquellas Cookies que son estrictamente necesarias para el funcionamiento de la web. El bloqueo de algunas cookies puede afectar tu experiencia en la web y el funcionamiento de la misma. Para más información puedes visitar nuestra Política de Cookies.

Cookies estrictamente necesarias (técnicas)

Estas Cookies son necesarias para que el sitio web funcione y no se pueden desactivar en nuestros sistemas. Por lo general, solo se establecen en respuesta a aquellas acciones que puedas realizar como una solicitud de servicios, establecer tus preferencias de privacidad, iniciar sesión o completar formularios. Puedes configurar tu navegador para que bloquee o te avise sobre estas cookies, pero algunas partes del sitio web no funcionarán. Información sobre las Cookies

Cookies analíticas

Estas Cookies nos permiten contabilizar el número de visitas y las fuentes de tráfico para que podamos medir y mejorar el rendimiento de nuestro sitio. Nos ayudan a saber que paginas son las más populares y menos populares, y ver como los visitantes se mueven por el sitio web. Toda la información que recopilan estas Cookies es agregada por lo tanto, anónima. Si no permites estas Cookies no sabremos cuándo visitaste nuestro sitio web. Información sobre las Cookies

Cookies a terceros

Estas cookies se utilizan para el análisis de tu actividad con el fin de mostrarte anuncios personalizados. Información sobre las Cookies

Acepto Rechazar Configurar las cookies Confirmar selección
Buscar...
×
Notas
Buscar...
No hay notas
  • First steps - TEACHER
  • Para personalizar Lápiz pulsa Alt + flecha hacia abajo
  • Para personalizar Subrayador pulsa Alt + flecha hacia abajo

    Cambiar tema

    Error - verifique su conexión a internet...
    Volver

    Blink Help

    x
    Error - verifique su conexión a internet...

    FAQ

    Sin resultados

    Ver manual completo

    ¿No has solucionado tu duda?

    Describe con el mayor detalle posible tu duda. Indícanos el libro, la clase, dispositivo de acceso, código de licencia, usuario afectado y navegador o si te ocurre en la app:

    Grosor:
    Tamaño del texto:
    Filtrar
      No se han encontrado recursos
      Tamaño del texto:
      Modo revisión

      Modo revisión

      First steps - TEACHER
      First steps
      Sin sonido de fondo


      MANUAL INDEX

      Login to your user/create an account

      Add your licence codes

      Create your classes and invite your students


      MARZO 2021


      Login to your user /create an account

      Access https://www.blinklearning.com from your web browser and click on LOGIN if you have an account to introuced your user and password, or click on CREATE ACCOUNT if you are not a BlinkLearning user yet.

      Enter a valid teacher license code in the first field. It refers to the alphanumeric code that gives access to the digital version of a book. Then click on I am a teacher .

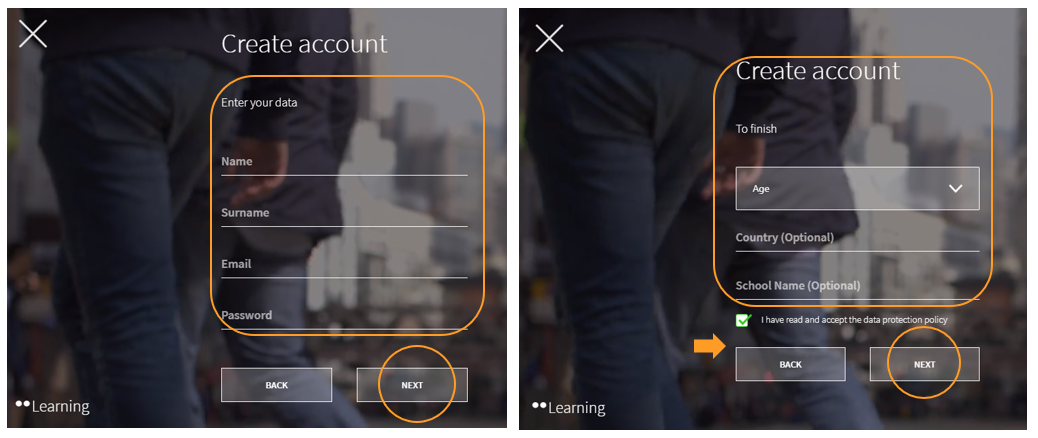
      After that, you must complete the required fields in the registration form and click on NEXT . To finish, select your age (this is to know if you are of legal age), accept the data protection policy and finally click on NEXT .

      Add your licence codes

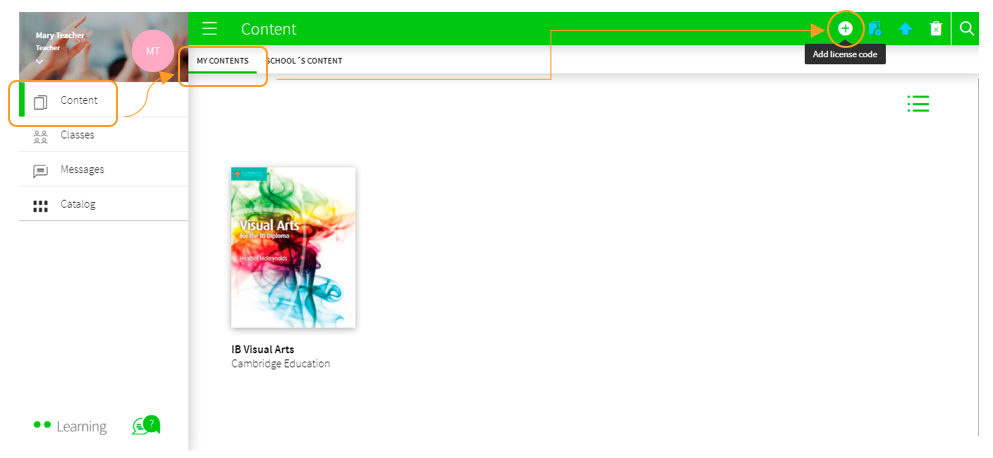
      If you have new licence codes, you can add them to your profile at any time. To do so, go to the Content section, in the MY CONTENTS tab, and click on the + Add Licence Code button in the navigation bar.

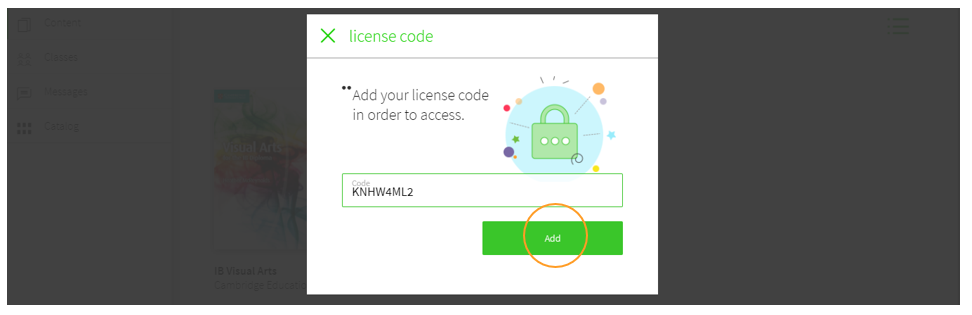
      Next, enter the Licence Code, which must have at least 9 alphanumeric digits and must not have been previously activated. Finally, click on ADD .

      If your school has requested teacher licences from the publishers, you can find them in the SCHOOL'S CONTENT tab. If you cannot find it, you can request it to our e-mail: help@blinklearnin.com

      If a pink ribbon is shown with the message 'Missing licence codes', you will need to request additional licence codes from the publisher in order to add that book.

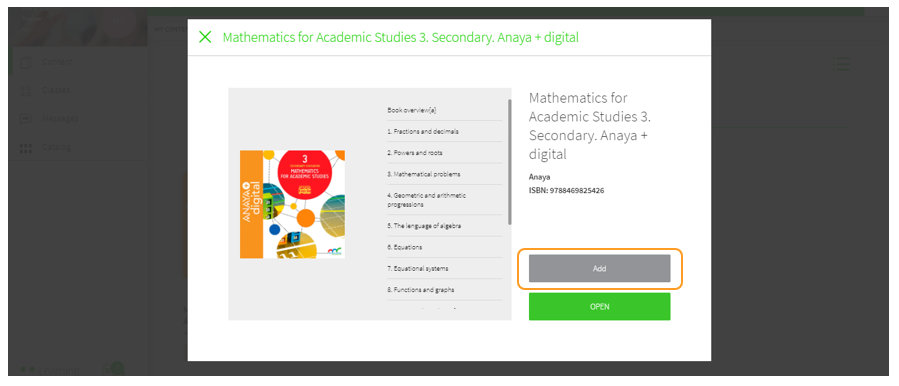
      Next, click on the cover of the book you need and select ADD .

      The book will be added to your MY CONTENTS tab automatically, so you can use it.

      It is important to note that, in order to assign a book to your classes and share it with your students, you must have that book in the MY CONTENTS tab on your profile and have proper access. Similarly, students will need to add their licence codes to their profiles to access the book.

      You can have a look at the books available in BlinkLearning from the Catalog section on your profile. You can purchase licences by contacting the publisher or by accessing to shop.blinklearning.com to make the purchase.

      Create your classes and invite your students

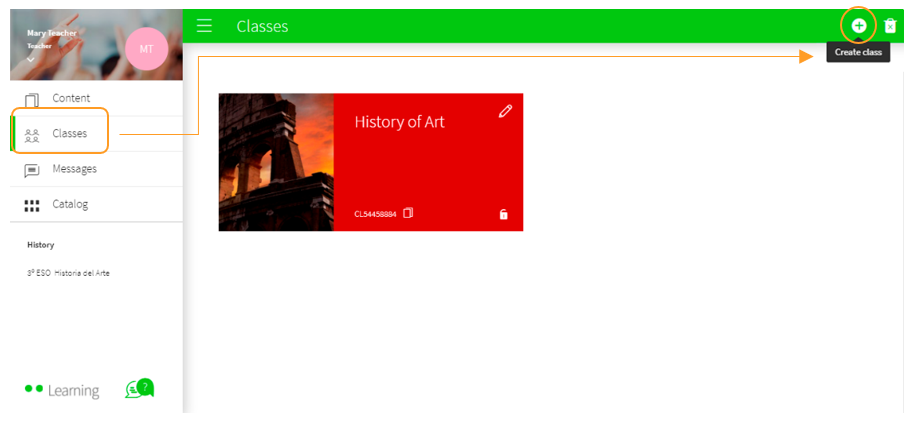
      To invite your students to a class using a code, go to the Classes section and click on the + CREATE CLASS button in the top navigation bar.

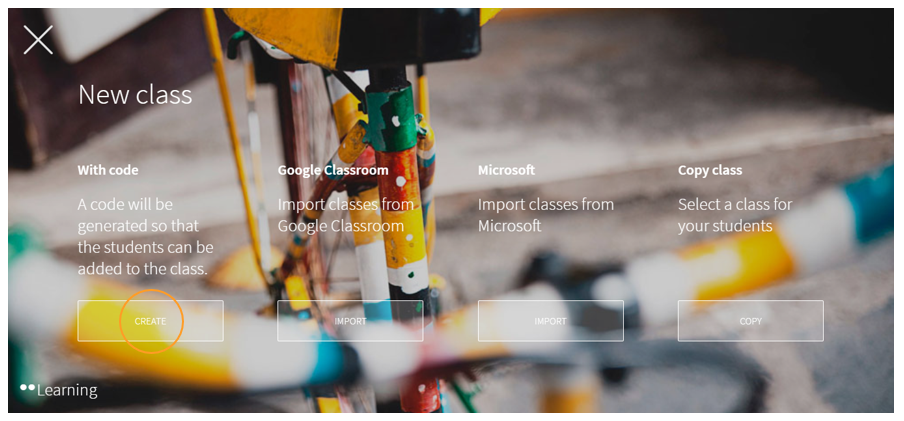
      Select the With code option and click on CREATE .

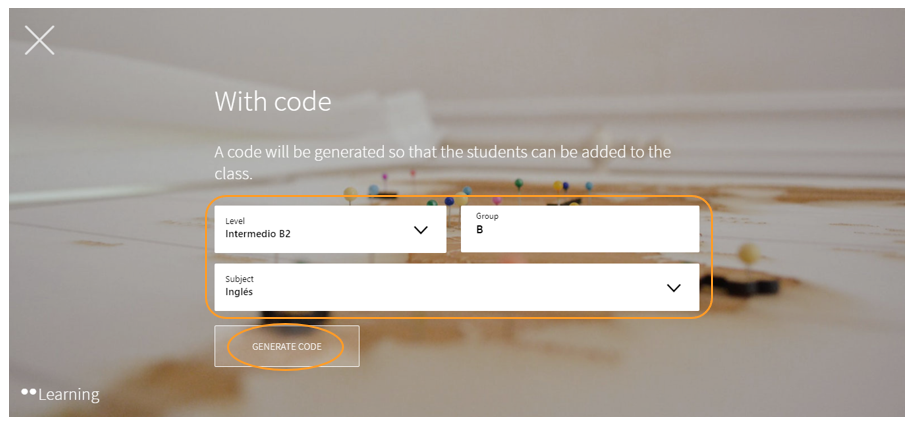
      Fill in the required fields with your class information (Level, group and subject) and click on GENERATE CODE .

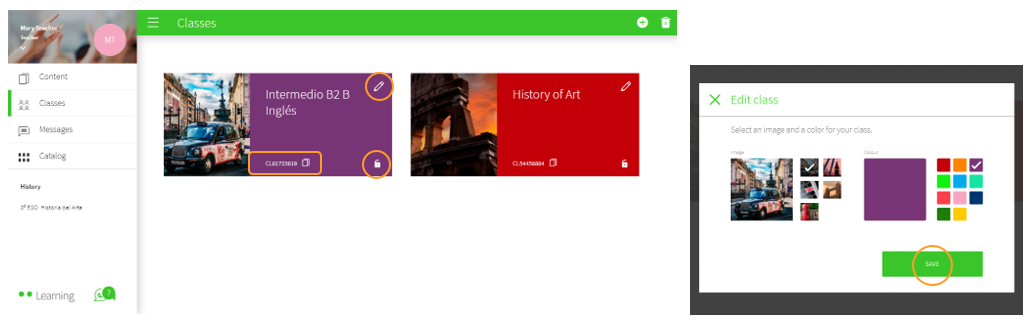
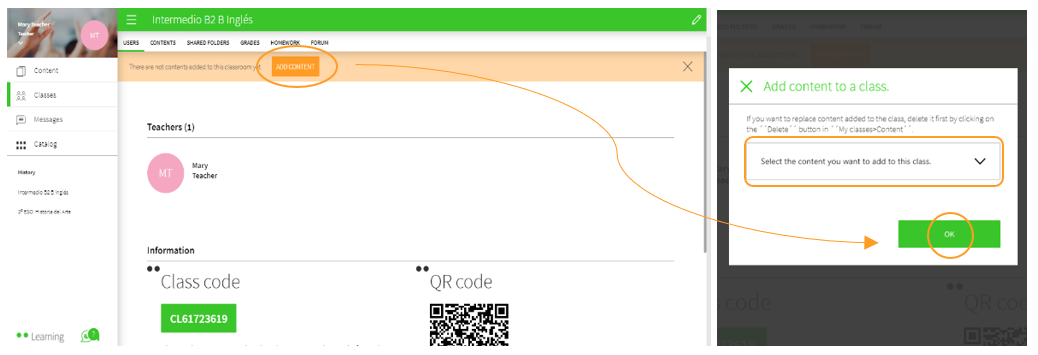
      Once you have created the class, you can edit and customise it by clicking on the pencil. You can also copy the code to send it to your students, or close the lock so that no one else can join your class.

      Before sending the code to your students, you will need to add content to your class. Click on ADD CONTENT , select the book in the drop-down menu and click on OK .

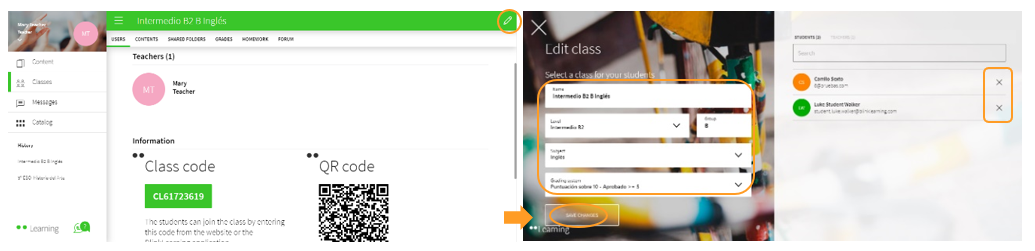
      You can edit class information at any time by clicking on the pencil. Here, you can delete students who have joined by mistake by clicking on the X and then SAVE CHANGES .

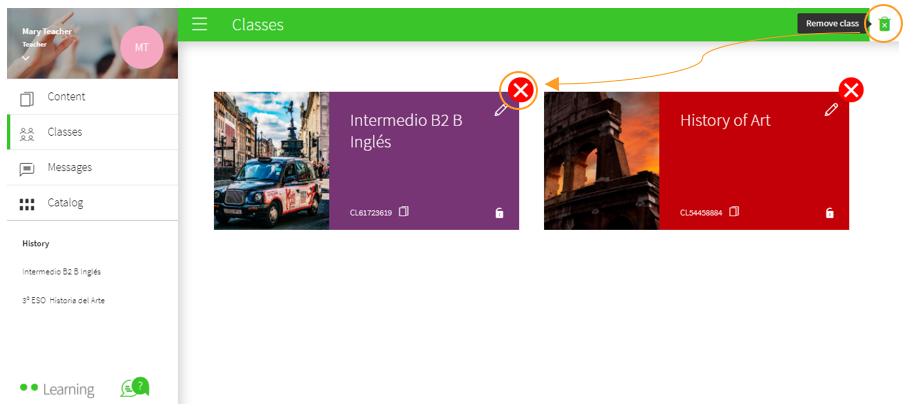
      You can also delete the class if you have created it by mistake. Activate the Remove class button and click on the red X of the class you want to delete.


      Do you need help?

      Send us your question to help@blinklearning.com .


      ← Ask any questions you may have about your BlinkLearning profile here

      All BlinkLearning
      video tutorials here
        →

      ,
      Has completado el tema!

      A continuación te mostramos el tiempo empleado y el número de aciertos.

      Tiempo empleado

      Calificación

      1. 1
        Borrador
        Editor de texto enriquecido
        cerrar